How to Make Kefir at Home
Welcome to your ultimate guide on how to make kefir at home. Kefir is a tasty fermented dairy drink full of probiotics, vitamins, and minerals. In this guide, you’ll learn all you need to make your own homemade kefir. We’ll cover the supplies, the fermentation steps, and tips for a great second fermentation. Plus, we’ll share common troubleshooting tips to make sure your kefir drink recipe is perfect every time. Get ready to enjoy the great benefits of second fermentation kefir in your own kitchen!

Key Takeaways
- Kefir is a probiotic-rich fermented dairy beverage that is easy to make at home.
- You’ll need kefir grains or a starter culture, milk, and the right equipment to get started.
- The fermentation process involves combining the kefir grains and milk, then incubating the mixture for 24-48 hours.
- Second fermentation allows you to customize the flavor of your kefir by adding fruit, spices, or other ingredients.
- Proper storage and maintenance of your kefir grains is key to ensuring successful batches every time.
Introduction to Kefir: A Probiotic-Rich Beverage
Kefir is a fermented dairy drink that’s becoming more popular. It comes from the Caucasus Mountains and is full of probiotics and nutrients. Let’s dive into the world of kefir and see how it can improve your health.
What is Kefir?
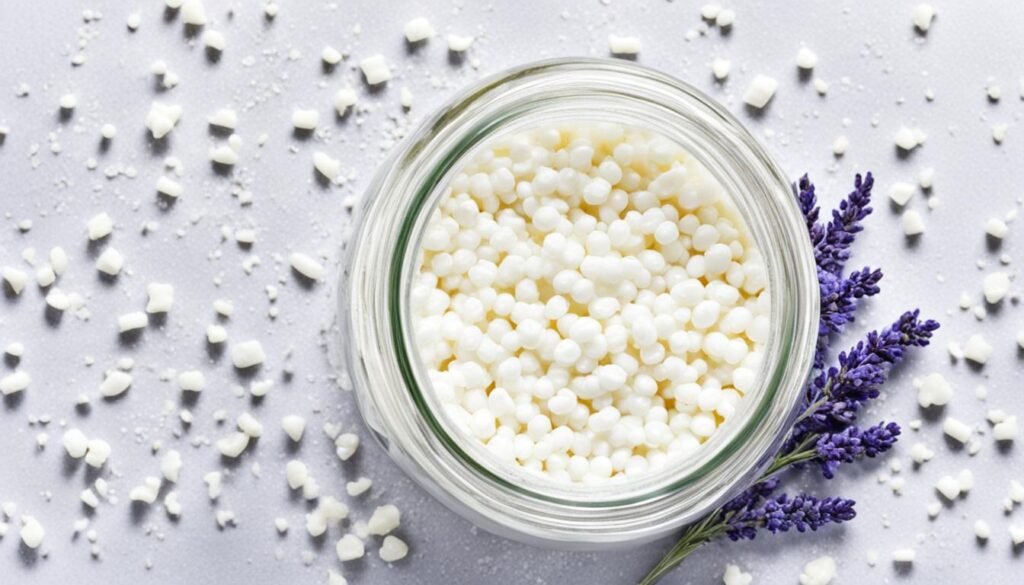
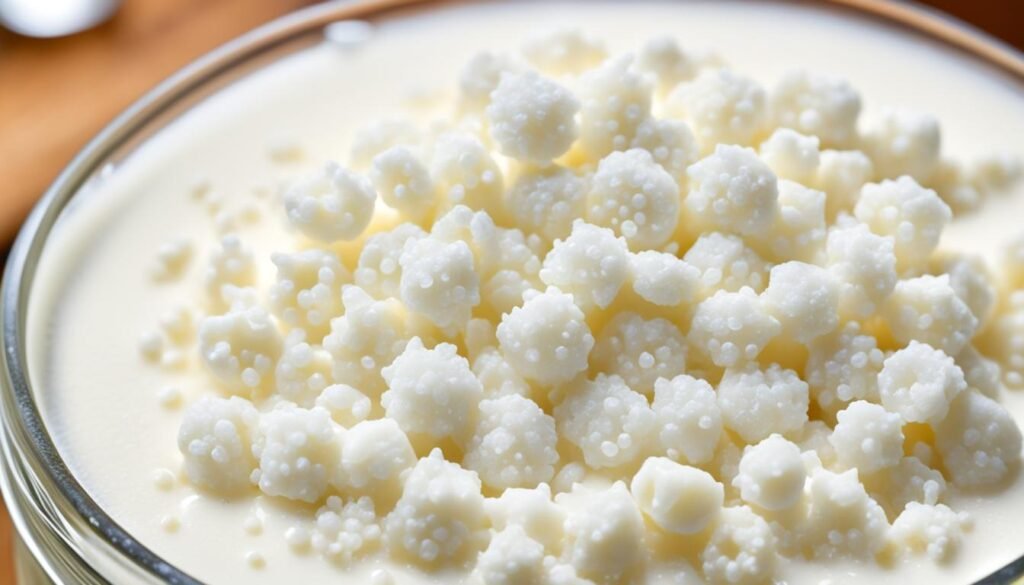
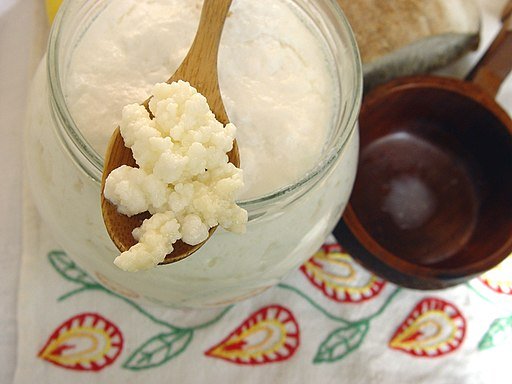
Kefir is made by fermenting milk with special bacteria and yeast, called kefir grains. These grains look like small cauliflower florets. They turn the milk’s lactose into a fizzy, tangy, and creamy drink.
Benefits of Homemade Kefir
Drinking homemade kefir can be great for your health. It’s full of probiotics, which help your gut and aid digestion. It also has vitamins and minerals like calcium, vitamin B12, and vitamin K.
Studies show that kefir might help reduce inflammation and boost your immune system.
| Nutrient | Amount per 1 Cup Serving |
|---|---|
| Calories | 150 |
| Protein | 10g |
| Carbohydrates | 12g |
| Fat | 8g |
| Calcium | 300mg |
| Vitamin B12 | 1.2mcg |
| Vitamin K | 0.1mcg |
Homemade kefir is great for gut health, boosting nutrients, and trying new flavors. It’s a versatile and healthy choice for any diet. By learning about its benefits, you can enjoy a healthier lifestyle.
Gathering the Necessary Supplies
Before starting to make your own kefir at home, you need a few key items. You’ll need kefir grains or a kefir starter culture, and the right milk for fermenting.
Kefir Grains or Starter Culture
Kefir can be made with kefir grains or a powdered starter culture. Kefir grains are a mix of bacteria and yeast that ferment the milk. You can reuse these grains to make more kefir. Or, you can use a powdered starter culture that needs to be replaced over time.
Milk and Containers
There are many milks you can use for kefir. Choose from whole cow’s milk, goat’s milk, or plant-based milks like almond or coconut milk. Pick a milk you like, as the kefir will taste similar to it. You’ll also need a container without metal, like a glass jar or a food-grade plastic one, for fermenting the kefir.
| Milk Type | Suitability for Kefir |
|---|---|
| Whole Cow’s Milk | Excellent |
| Goat’s Milk | Excellent |
| Almond Milk | Good |
| Coconut Milk | Good |
With your kefir grains or starter culture and your chosen milk ready, you’re set to make your own probiotic-rich kefir at home.
Preparing the Kefir Grains
Are you ready to make homemade kefir? First, you need to prepare your kefir grains for fermentation. This guide will show you how to activate and keep your kefir grains ready for making kefir.
Activating Your Kefir Grains
Start by activating your kefir grains if they’ve been stored or dried. Here’s what to do:
- Put the kefir grains in a clean glass jar or container.
- Add fresh, cold milk so the kefir grains are covered.
- Use a coffee filter or a cloth that lets air in to cover the jar. Hold it down with a rubber band.
- Let the kefir grains ferment at room temperature for 24-48 hours. The milk should thicken and taste tangy.
After the kefir grains are active and the milk is fermented, you’re ready for the next step.
Maintaining Your Kefir Grains
To keep your kefir grains healthy and working well, follow these tips:
- Rinse the kefir grains with cool, filtered water after each batch. This removes leftover milk or residue.
- Put the kefir grains in a clean glass jar or container. Keep them covered with fresh milk.
- Keep the kefir grains in the fridge between uses. This slows down fermentation and stops over-culturing.
- Feed the kefir grains with new milk every 7-10 days. This keeps them active and healthy.
By properly caring for your kefir grains, you’ll make delicious, probiotic-rich kefir at home.
The Fermentation Process
At the core of making homemade kefir is the fermentation process. This step turns milk and kefir grains into a probiotic-rich drink we all love. Let’s explore this journey in detail.
Combining Milk and Kefir Grains
The first step in the kefir fermentation process is mixing fresh, high-quality milk with kefir grains or starter culture. Stir the mix until the grains spread out evenly. This makes sure the fermentation is even and gives the drink its unique taste and texture.
Incubation Time and Temperature
The incubation time for kefir is crucial for the right consistency. Kefir usually needs 12-24 hours at room temperature, between 68-85°F (20-29°C). This lets the good bacteria and yeasts in the grains turn the milk’s lactose into lactic acid. This makes the kefir tangy and slightly fizzy.
Watch the kefir closely during this time. The exact time can change based on the temperature, kefir grain strength, and your taste. Try the kefir now and then to see when it’s just right.
“The key to making the perfect kefir is to pay attention to the fermentation process and adjust the incubation time and temperature to suit your personal taste preferences.”
How to Make Kefir
Making homemade kefir is easy and lets you enjoy a tasty, probiotic drink in your kitchen. It’s great for both kefir lovers and newcomers to fermented foods. This guide will show you how to make kefir and give you a homemade kefir recipe. You’ll learn to make your own kefir at home.
- Obtain Kefir Grains: First, get kefir grains, the live cultures that turn milk into kefir. You can buy them at health food stores, online, or from a kefir-making friend.
- Prepare the Milk: Pick your favorite milk type, like cow’s, goat’s, or plant-based options. Make sure it’s fresh and top quality.
- Combine Milk and Kefir Grains: Put the milk and kefir grains in a clean jar. Use 1-2 tablespoons of grains per 1 cup of milk as a rule.
- Ferment the Mixture: Cover the jar with a cloth or coffee filter. Let it ferment at room temperature for 24-48 hours. The longer it ferments, the sourer it gets.
- Strain the Kefir: After fermentation, use a utensil to separate the kefir grains from the milk. Strain the kefir through a fine-mesh strainer to catch the grains. Keep them for your next batch.
- Enjoy Your Homemade Kefir: Your kefir is now ready to drink! You can have it plain or add fruits, sweeteners, and other flavors to taste.
With these easy steps, you can make delicious, probiotic-rich homemade kefir every day.
Second Fermentation: Adding Flavors
Once you’ve learned to make basic kefir, the fun really starts! Try a second fermentation to add tasty flavors to your homemade kefir. This guide will show you how to make second fermentation kefir and flavored kefir recipes. You’ll discover a world of new possibilities for your probiotic drink.
Fruit Purees and Juices
Fruit-infused kefir is a favorite, blending the natural sweetness of fruits with the tangy taste of kefir. Try different fruits, like classic berries, tropical mango, or pineapple. Just add a few tablespoons of your favorite fruit to your kefir, mix well, and let it ferment again.
- Strawberry Kefir: Blend fresh strawberries into a smooth puree and mix it into your kefir.
- Blueberry Blast: Mash blueberries and incorporate them into your kefir for a burst of antioxidants.
- Pineapple Paradise: Mix pineapple juice or puree into your kefir for a tropical twist.
Spices and Extracts
Adding spices and extracts to your flavored kefir recipes is a great idea for those who love to try new things. Cinnamon, vanilla, and cocoa powder are great choices, adding depth to your kefir. Start with a little and taste as you go, adjusting to your liking.
- Cinnamon Swirl: Sprinkle ground cinnamon into your kefir and stir to create a warm, comforting flavor.
- Vanilla Dream: Add a few drops of pure vanilla extract to your kefir for a classic, creamy taste.
- Chocolate Indulgence: Mix in a tablespoon of unsweetened cocoa powder for a rich, decadent kefir experience.
Get creative and mix different flavors to create your ideal second fermentation kefir recipe. There are so many options, so have fun and enjoy the tasty results!
“The beauty of homemade kefir is the ability to customize it to your unique taste preferences. Embrace the second fermentation process and let your inner flavor artist shine!”
Storing and Maintaining Your Kefir Grains
Storing and maintaining your how to store kefir grains is key for a steady supply of fresh kefir. Here, you’ll find the best ways to keep your how to maintain kefir grains healthy for ongoing kefir making.
Storing Kefir Grains
To store your kefir grains, just follow these steps:
- Rinse the grains with cool, filtered water to remove any leftover kefir.
- Pat the grains dry with a clean, lint-free cloth.
- Put the grains in a clean, airtight container with fresh, cold milk.
- Keep the container in the fridge, out of direct sunlight.
Maintaining Kefir Grains
Pay a bit of attention to healthy and active kefir grains. Here’s how to how to maintain kefir grains:
- Feed the grains fresh milk every 7-10 days.
- Stir the grains and milk gently to stop them from sticking together.
- Rinse the grains with cool, filtered water every few weeks to clean them.
- If the grains smell bad or look off, it’s time to get new ones.
By using these easy how to store kefir grains and how to maintain kefir grains tips, your kefir grains will stay healthy and ready. This means you’ll always have a supply of this probiotic drink.
“Proper storage and maintenance of your kefir grains are crucial for ensuring a consistent supply of fresh kefir.”
Troubleshooting Common Issues
Making homemade kefir can be rewarding, but you might face some challenges. Issues like separating the kefir grains or fixing problems during fermentation can happen. This section offers tips to make your kefir-making smooth.
Separating the Kefir Grains
Sometimes, kefir grains stick together, making them hard to separate. This might happen if the grains sit in milk too long or if the fermentation is too fast. To fix this, gently shake or stir the kefir or use a spoon to carefully separate the grains. If they’re still stuck, rinse them under cool water to help loosen them.
Identifying and Fixing Problems
If your kefir has an odd smell, feels slimy, or doesn’t seem to ferment, act fast. Common problems include:
- Kefir grains not thriving – This could be from poor storage, extreme temperatures, or using the wrong type of milk. Try changing the storage or milk type.
- Kefir taking too long to ferment – It might be due to low-quality grains, a cool environment, or pasteurized milk. Try warming up the spot or switching to raw milk.
- Kefir tasting unpleasant – Bad taste or smell could mean the grains are over-fermented or the milk is old. Adjust the fermentation time or use fresh milk.
Fixing kefir troubleshooting and issues with kefir grains might take some tries, but patience and experimentation will help. You’ll soon master making homemade kefir.

Conclusion
Making kefir at home is rewarding and saves money. You can easily make a delicious, probiotic-rich drink by following this guide. This way, you can enjoy the benefits of homemade kefir every day.
Homemade kefir is not just healthy. It lets you control the ingredients and flavors. This makes it a personalized and satisfying drink.
The benefits of homemade kefir go beyond probiotics. It helps with gut health, boosts immunity, and gives you important vitamins and minerals. Making kefir at home lets you have a drink that fits your health and taste needs.
If you love kefir or are new to fermented drinks, this guide has helped you. Start making your own kefir, try different flavors, and enjoy the refreshing, probiotic-rich taste.
FAQ
What is kefir?
Kefir is a fermented dairy drink full of probiotics and nutrients. It’s made by fermenting milk with kefir grains or a starter culture. This makes a tangy, slightly bubbly drink.
What are the benefits of homemade kefir?
Homemade kefir is full of probiotics, which help your gut, boost your immune system, and offer many health benefits. It also has protein, calcium, and other important vitamins and minerals.
What supplies do I need to make kefir at home?
For homemade kefir, you need kefir grains or a starter culture, milk, and containers for fermenting. Having a strainer and tools for flavoring is also good to have.
How do I prepare the kefir grains before starting the fermentation?
If using kefir grains, activate and maintain them first. Rinse the grains and soak them in milk for a few hours or days. This makes them ready for fermentation.
How long does the kefir fermentation process take?
Fermenting kefir takes 24-48 hours, depending on your environment’s temperature. Longer fermentation makes the flavor tangier and more sour.
Can I add flavors to my homemade kefir?
Yes, adding flavors to your kefir during a second fermentation is easy. Use fruit purees, juices, spices, or extracts to make tasty variations.
How do I store and maintain my kefir grains?
Keeping your kefir grains in good condition is key for fresh kefir. Store them in the fridge, in milk or water, and feed them often to keep them healthy.
What are some common issues I might encounter when making kefir?
Making kefir can lead to issues like grain separation, texture or flavor changes, and fermentation problems. This section offers tips to fix these issues.


Pingback: Kefir Vs Yogurt: Which Is Better For Your Health? | Tasty Tykes